
Kubernetes Home Lab in 2025: Part 0 - Bootstrapping the Cluster
First things first, we need some nodes that make up our cluster.
I will be using libvirt to manage my VMs, as I wanted an excuse to try out the dmacvicar/libvirt Terraform provider. I’m excited to see how this rather bare-bones approach will compare to using solutions like unRAID, Proxmox or Vagrant. Still, this chapter is rather self-contained, so if you decide to go with any other infrastructure provider, you should be able to pick up from the next chapter.
Primer on libvirt
Libvirt is a toolkit to manage virtualization platforms. Libvirt itself is a hypervisor agnostic API that allows you to manage virtual machines on different hypervisors like KVM or QEMU.
Its terminology might not be familiar to everyone, so let’s quickly go over the most important concepts:
- Domain: A domain is a virtual machine.
- Volume: A volume is used to store a virtual machine image.
- Storage Pool: A storage pool is a container of multiple volumes. Every volume has to be part of a storage pool.
Setting up libvirt
On my Ubuntu 24.04 system I installed the following packages:
sudo apt install -y qemu-kvm libvirt-daemon-system libvirt-clients bridge-utils virt-manager
sudo usermod -aG libvirt $(whoami)
sudo systemctl enable --now libvirtd
I do like to have virt-manager as a GUI to quickly discover information about
my VMs, storage pools and networks. Rest assured, all changes will be made using
Terraform!
You can even run virt-manager locally on your machine and connect
to the remote libvirt daemon via SSH.
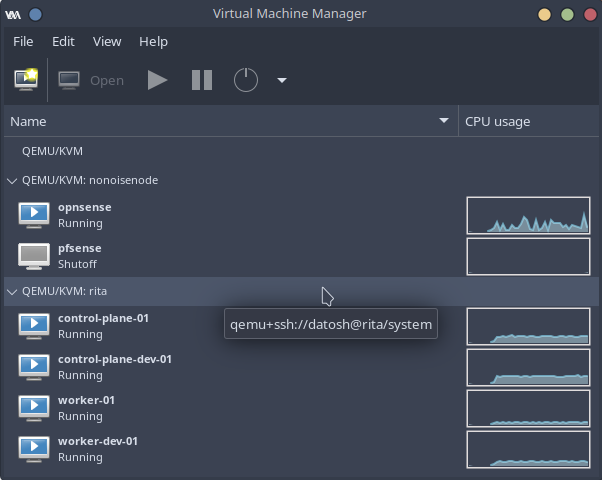
Monitor virtual machines on remote servers.
kvm-ok provides us with a quick sanity check:
$ kvm-ok
INFO: /dev/kvm exists
KVM acceleration can be used
Setting up a network bridge
As we want to easily access the VMs from our home network, we will create a bridge interface on our host system. We will declare the additional interface in our netplan configuration.
network:
  version: 2
  ethernets:
    enp7s0:
      dhcp4: no
  bridges:
    br0:
      interfaces: [enp7s0]
      macaddress: 52:54:00:00:00:01
      dhcp4: true
enp7s0 with the name of your network interface. You can
find out the name of your interface by running ip a.
After applying the configuration with sudo netplan apply, check that the
bridge is up and running:
$ › ip a show br0
3: br0: <BROADCAST,MULTICAST,UP,LOWER_UP> mtu 1500 qdisc noqueue state UP group default qlen 1000
    link/ether 52:54:00:00:00:01 brd ff:ff:ff:ff:ff:ff
    inet 192.168.1.5/24 metric 100 brd 192.168.1.255 scope global dynamic br0
       valid_lft 6271sec preferred_lft 6271sec
    inet6 fe80::5054:ff:fe00:1/64 scope link
       valid_lft forever preferred_lft forever
Setting up Terraform
Finally, we can start setting up our Terraform configuration. We will use the dmacvicar/libvirt provider to manage our VMs.
Create a file called main.tf with the following content:
terraform {
  required_providers {
    libvirt = {
      source = "dmacvicar/libvirt"
      version = "0.7.1"
    }
  }
}

provider "libvirt" {
  uri = "qemu+ssh://192.168.1.5/system?keyfile=/home/datosh/.ssh/id_ed25519&sshauth=privkey"
}
ssh-copy-id is your friend here.
Let’s pull in the required dependencies:
terraform init
Next, we lay the foundation for our VMs.
Our network configuration uses the bridge we created earlier:
resource "libvirt_network" "kube_network" {
  name = "k8snet"
  mode = "bridge"
  bridge = "br0"
  autostart = true
}
We create a storage pool and pull in the Ubuntu 24.04 cloud image:
resource "libvirt_pool" "k8s" {
  name = "k8s"
  type = "dir"
  path = "/home/datosh/libvirt_pools/k8s"
}

resource "libvirt_volume" "ubuntu_server" {
  name   = "ubuntu-server-24-LTS.qcow2"
  pool   = libvirt_pool.k8s.name
  source = "https://cloud-images.ubuntu.com/releases/24.04/release/ubuntu-24.04-server-cloudimg-amd64.img"
  format = "qcow2"
}
Finally, we can create our control plane node:
resource "libvirt_domain" "control_plane" {
  name   = "control-plane-01"
  memory = 2048
  vcpu   = 2

  running = true
  autostart = true

  cloudinit = libvirt_cloudinit_disk.control_plane.id

  disk {
    volume_id = libvirt_volume.control_plane.id
  }

  network_interface {
    network_id = libvirt_network.kube_network.id
    mac = "52:54:00:01:01:01"
    hostname = "control-plane-01"
    wait_for_lease = true
  }
  qemu_agent = true

  console {
    type        = "pty"
    target_port = "0"
  }
}

resource "libvirt_volume" "control_plane" {
  name   = "control_plane.qcow2"
  pool   = libvirt_pool.k8s.name
  base_volume_id = libvirt_volume.ubuntu_server.id
  format = "qcow2"
  size = 21474836480 # 20GB
}

resource "libvirt_cloudinit_disk" "control_plane" {
  name           = "control_plane.init.iso"
  pool           = libvirt_pool.k8s.name
  user_data      = <<-EOF
    #cloud-config
    # https://cloudinit.readthedocs.io/en/latest/reference/modules.html

    growpart:
      mode: auto
      devices: ['/']

    hostname: control-plane-01

    keyboard:
      layout: de
      variant: nodeadkeys

    package_update: true
    package_upgrade: true
    packages:
    - qemu-guest-agent

    runcmd:
    - systemctl restart qemu-guest-agent

    ssh_authorized_keys:
      - ssh-ed25519 AAAAC3NzaC1lZDI1NTE5AAAAIMmu6T/Dr2PGxPhl+eqnFquvgqrzzFbR87W90H6S2+sE datosh@xps-9510
  EOF
}
And the worker node:
resource "libvirt_domain" "worker" {
  name   = "worker-01"
  memory = 4096
  vcpu   = 2

  running = true
  autostart = true

  cloudinit = libvirt_cloudinit_disk.worker.id

  disk {
    volume_id = libvirt_volume.worker.id
  }

  network_interface {
    network_id = libvirt_network.kube_network.id
    mac = "52:54:00:01:02:01"
    hostname = "worker-01"
    wait_for_lease = true
  }
  qemu_agent = true

  console {
    type        = "pty"
    target_port = "0"
  }
}

resource "libvirt_volume" "worker" {
  name   = "worker.qcow2"
  pool   = libvirt_pool.k8s.name
  base_volume_id = libvirt_volume.ubuntu_server.id
  format = "qcow2"
  size = 21474836480 # 20GB
}

resource "libvirt_cloudinit_disk" "worker" {
  name           = "worker.init.iso"
  pool           = libvirt_pool.k8s.name
  user_data      = <<-EOF
    #cloud-config

    growpart:
      mode: auto
      devices: ['/']

    hostname: worker-01

    keyboard:
      layout: de
      variant: nodeadkeys

    package_update: true
    package_upgrade: true
    packages:
    - qemu-guest-agent

    runcmd:
    - systemctl restart qemu-guest-agent

    ssh_authorized_keys:
      - ssh-ed25519 AAAAC3NzaC1lZDI1NTE5AAAAIMmu6T/Dr2PGxPhl+eqnFquvgqrzzFbR87W90H6S2+sE datosh@xps-9510
  EOF
}
A few things to note about the VM definitions:
- I set a static MAC address for the network interfaces, and then set up static DHCP mappings on my router, so that the machines have a predictable IP address. If you don’t do this, nothing bad will happen. Just ensure you check the assigned IP addresses in the Terraform output or Virtual Machine Manager.
- The
qemu-guest-agentdoesn’t start automatically, so I added aruncmdto restart the service. - Replace the authorized SSH key with your own.
Now we can apply the configuration:
terraform apply
Bootstrapping the cluster
The next steps follow the official
Kubernetes documentation
as we bootstrap the cluster with kubeadm.
In order to prepare the nodes and install the necessary packages, we run the following script on both nodes:
#!/bin/bash

set -ex

## We don't have any swap in our instances so we can skip this step
# Swap off
# sudo swapoff -a
# sed -i '/ swap / s/^\(.*\)$/#\1/g' /etc/fstab

# Kernel mods
cat <<EOF | sudo tee /etc/modules-load.d/k8s.conf
overlay
br_netfilter
EOF

sudo modprobe overlay
sudo modprobe br_netfilter

# Networking
cat <<EOF | sudo tee /etc/sysctl.d/k8s.conf
net.bridge.bridge-nf-call-iptables  = 1
net.bridge.bridge-nf-call-ip6tables = 1
net.ipv4.ip_forward                 = 1
EOF
sudo sysctl --system

# Prepare apt for 3rd party repos
sudo apt-get update
sudo apt-get install -y apt-transport-https ca-certificates curl gpg
sudo install -m 0755 -d /etc/apt/keyrings

# Add Docker apt repo
sudo curl -fsSL https://download.docker.com/linux/ubuntu/gpg -o /etc/apt/keyrings/docker.asc
echo "deb [arch=$(dpkg --print-architecture) signed-by=/etc/apt/keyrings/docker.asc] https://download.docker.com/linux/ubuntu \
  $(. /etc/os-release && echo "$VERSION_CODENAME") stable" | sudo tee /etc/apt/sources.list.d/docker.list > /dev/null

# Add Kubernetes apt repo
curl -fsSL https://pkgs.k8s.io/core:/stable:/v1.32/deb/Release.key | sudo gpg --dearmor -o /etc/apt/keyrings/kubernetes-apt-keyring.gpg
echo 'deb [signed-by=/etc/apt/keyrings/kubernetes-apt-keyring.gpg] https://pkgs.k8s.io/core:/stable:/v1.32/deb/ /' | sudo tee /etc/apt/sources.list.d/kubernetes.list

# Update 3rd party repos
sudo apt-get update

# Install containerd
sudo apt-get install containerd.io -y
# Configure cgroup driver to systemd for containerd
containerd config default | sudo tee /etc/containerd/config.toml
sudo sed -i 's/SystemdCgroup \= false/SystemdCgroup \= true/g' /etc/containerd/config.toml
# Restart and enable containerd service
sudo systemctl restart containerd
sudo systemctl enable containerd

# Install kubeadm, kubelet and kubectl
sudo apt-get install -y kubelet kubeadm kubectl
sudo apt-mark hold kubelet kubeadm kubectl
# Enable and start kubelet service
sudo systemctl daemon-reload
sudo systemctl start kubelet
sudo systemctl enable kubelet.service

# Pull k8s images
sudo kubeadm config images pull
Then we can initialize the control plane node:
sudo kubeadm init
And join the worker node. Ensure to copy the actual token and hash from the output of the previous command:
sudo kubeadm join \
    --token <token> \
    --discovery-token-ca-cert-hash sha256:<hash> \
    <control-plane-host>:<control-plane-port>
Logging back into the control plane node, we configure kubectl:
mkdir -p $HOME/.kube
sudo cp -i /etc/kubernetes/admin.conf $HOME/.kube/config
sudo chown $(id -u):$(id -g) $HOME/.kube/config
And finally, we check the status of our cluster:
$ kubectl get nodes
NAME               STATUS     ROLES           AGE   VERSION
control-plane-01   NotReady   control-plane   24s   v1.32.1
worker-01          NotReady   <none>          10s   v1.32.1

$ kubectl get pod -A
NAMESPACE     NAME                                       READY   STATUS    RESTARTS   AGE
kube-system   coredns-668d6bf9bc-4rmg6                   0/1     Pending   0          41s
kube-system   coredns-668d6bf9bc-9zjks                   0/1     Pending   0          41s
kube-system   etcd-control-plane-01                      1/1     Running   0          47s
kube-system   kube-apiserver-control-plane-01            1/1     Running   0          47s
kube-system   kube-controller-manager-control-plane-01   1/1     Running   0          47s
kube-system   kube-proxy-jftn5                           1/1     Running   0          41s
kube-system   kube-proxy-lf2q7                           1/1     Running   0          36s
kube-system   kube-scheduler-control-plane-01            1/1     Running   0          47s
As with every first episode of a series, we end on a cliffhanger, and install the Cluster Networking together with some GitOps magic in the next post. Stay tuned!